 Skip to content


How To Setup A TIG Welder For First Use
While the TIG welding process is quite challenging to master, you can set up your TIG welder relatively quickly and start your TIG welding journey from a beginner to a fully-fledged TIG master.
This article will teach you how to assemble your TIG gear and set your TIG welder for first use. You’ll also learn how to choose a TIG shielding gas, filler metal wire, and tungsten electrode.
Let’s get started.
TIG Welding Safety
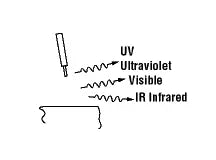
TIG welding requires a slightly different safety setup than other arc welding processes. TIG, or Gas Tungsten Arc Welding (GTAW), has a very focused, bright arc and doesn’t causes spatter. So, your primary concern with TIG is protecting your eyes from UV/IR radiation, not the body protection from molten slag. Obviously, you should still wear proper welding apparel and boots to protect yourself if the molten piece of metal does drop on you.
You will also need gloves for TIG welding. It’s just that they don’t have to be as heavy-duty as gloves for MIG or stick welding. So, using goatskin gloves works better for TIG. They shield your hands from the hot arc, but they offer improved finger dexterity for better TIG torch maneuverability.
Since TIG welding allows very low amperage output (as low as 5A on some welders), the TIG welding helmet must be sensitive enough to auto-darken on such a low-powered arc. You can also use our new linkable TIG welding helmet, the LYG-17-1300.
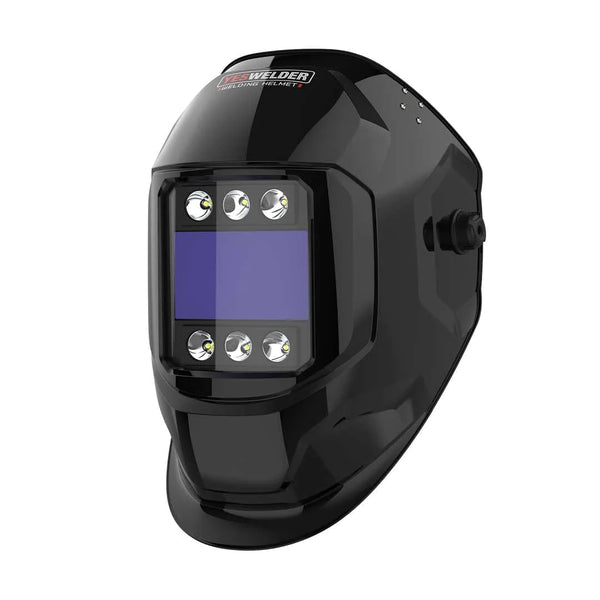
You can link it to the YesWelder YWT-200DC and the YesWelder TIG-225P, and it will auto-darken once the machine sends the pulse to the TIG torch. As a result, you’ll be protected from arc flash regardless of the set amperage output.
How TIG Welding Process Works - The Theory
The TIG is an arc welding process. So, it uses the resistance to the flow of electricity to heat and melt the base and filler metal. The power source (your TIG welder) sends electricity through the TIG torch, which goes through the welded material and flows through the ground clamp back into the welding machine. This closed circuit causes the welded metal to melt because it heats due to electrical flow resistance.
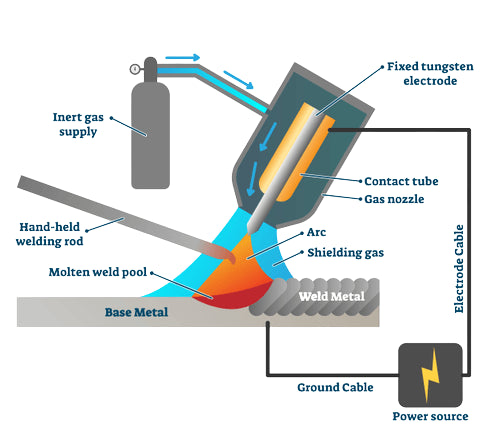
Source: https://www.electronicshub.org/mig-vs-tig-welding/
But you’ll get different results depending on if you hooked the TIG torch to the positive or negative plug on your welder. We’ll discuss the polarity setup later in the article, and you’ll see how to use polarity to your advantage and achieve better welds on various metals.
Setting Up Your TIG Welder For the First Time
Before powering your TIG welder, you need to assemble the TIG torch, choose your tungsten, and attach the shielding gas to the welder. Let’s explain how to do these step by step in detail.
Assembling The TIG Torch
A TIG torch is composed of a torch body, short or long back cap, collet, collet body, ceramic cup, and a tungsten electrode. You can replace the collet body with the gas lens kit for improved shielding gas flow, but it’s not necessary for most jobs.
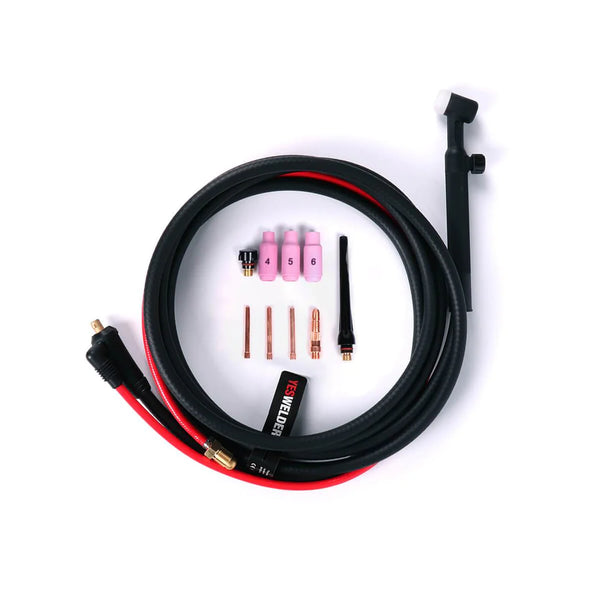
Follow these steps for easy TIG torch assembly:
- Screw the collet body into the front of the torch’s head snugly.
- Insert the collet into the collet body from the rear part of the torch head.
- Screw the back cap to the rear of the torch but only slightly. Don’t tighten it just yet.
- Insert the tungsten electrode from the front through the collet body and the collet.
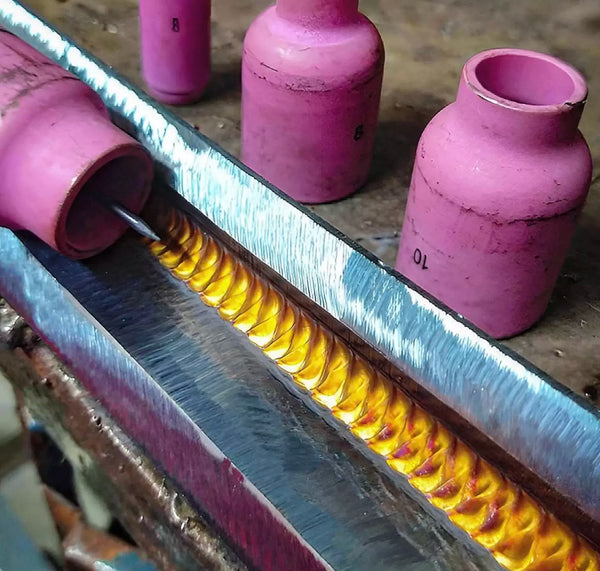
- Screw the ceramic cup (pink nozzle) over the collet body from the front of the torch.
- Adjust the tungsten stickout by untightening the back cap, which allows you to move the tungsten freely. Once you are satisfied with the stickout, tighten the back cap, and the tungsten electrode won’t be able to move anymore. Don’t overtighten the cap because you can deform the collet and lose the grip over the electrode inside it.
A good starting point for a tungsten stickout is to limit the stickout to the diameter of the ceramic cup. But you can adjust it depending on the welded joint type if you need more or less protrusion.
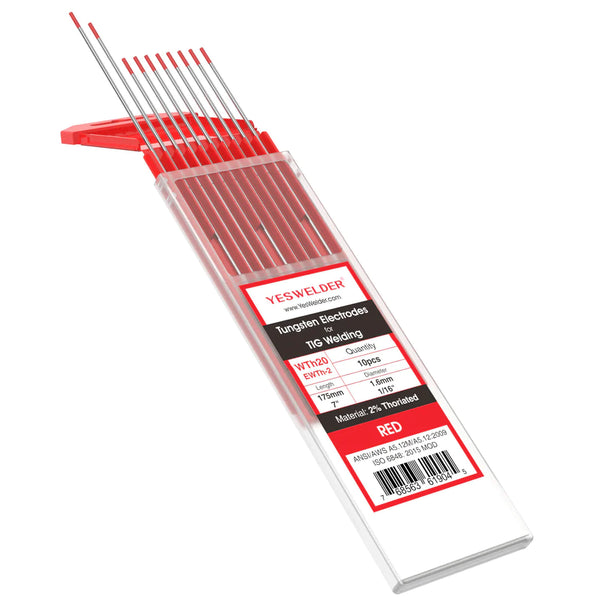
Tungsten Electrodes
The six major tungsten electrode types are:
- Pure tungsten EWP (Green) - Used for AC TIG welding aluminum and magnesium.
- Thoriated tungsten EWTh-2 (Red) - Used for DC TIG welding steel, steel alloys, nickel alloys, and most other metals except aluminum and magnesium. It has excellent arc-starting abilities, a low erosion rate, and great arc performance. It’s the most commonly used TIG electrode. But thorium oxide is a radioactive compound, so you must exercise caution when grinding it.
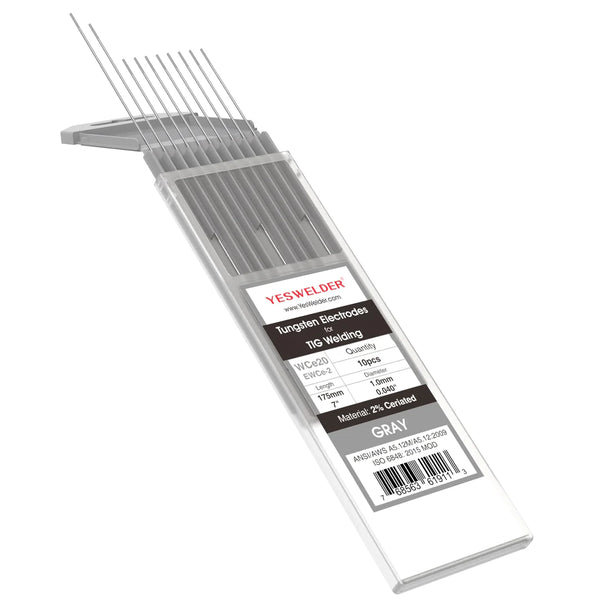
- Ceriated tungsten EWCe-2 (Gray) - Not radioactive. Best used for AC/DC TIG welding sheet metal at lower amperages. Ceriated tungsten has low erosion, lasts a long time, and works well for steel, aluminum, magnesium, nickel alloys, and various titanium grades.
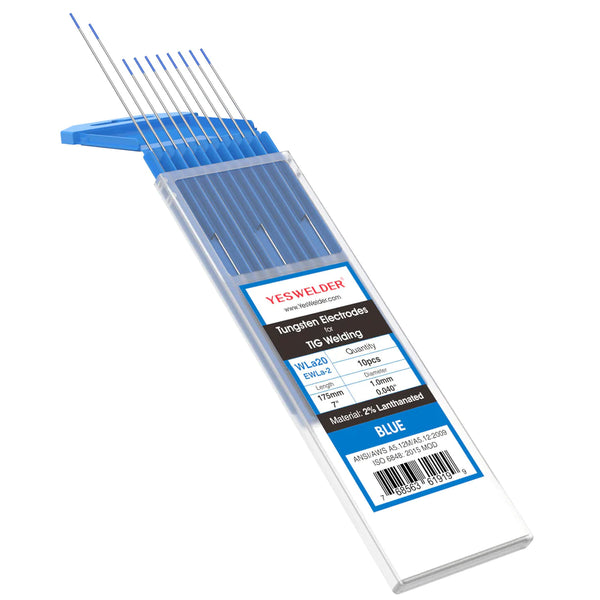
- Lantanated tungsten EWLa-2 (Blue) - Not radioactive. Excellent replacement for thoriated tungsten when welding at high amperages. You can use it for AC/DC TIG welding of thick and thin steel, aluminum, nickel alloys, magnesium, and titanium. It works best for stainless steel because it maintains a sharp tip and reduces heat input.
- Zirocniated tungsten EWZr-8 (White) - Best used for AC TIG welding aluminum and magnesium. It easily balls up its tip on AC and offers better arc stability than pure (green) tungsten.
- Rare earth mix EWG (purple) - Welding characteristics depend on the actual rare-earth mix.
We recommend getting the lanthanated or thoriated tungsten for beginners or the ceriated tungsten if you only plan to weld thin stock.
Shielding Gas Selection
Choosing the shielding gas is the easiest part of a TIG welding setup. You will almost always need a 100% argon gas bottle.
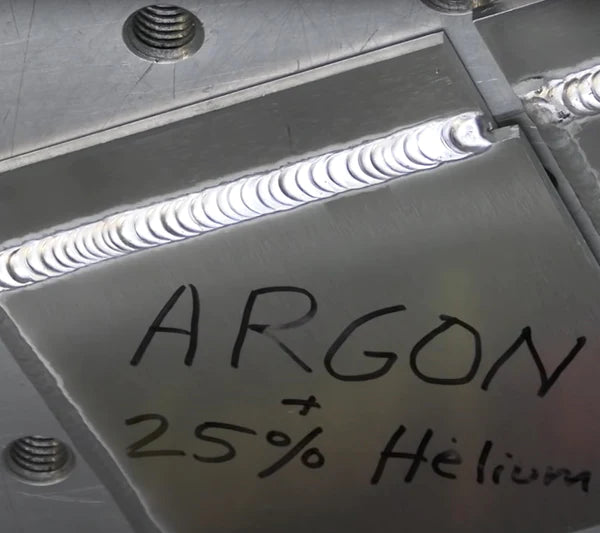
Pure argon works for TIG welding all metals from steel to aluminum and copper. But you can include some helium in the mix to improve weld penetration if your TIG welder’s amperage output is below the required for the welded thickness. For example, if your TIG welder can output 200A, but you wish to weld 1/2-inch thick aluminum, adding helium would improve puddle wetting and penetration.
You will also need a shielding gas regulator, like the YesWelder QBO1. Its purpose is to regulate the gas pressure (gas flow rate) released from the gas bottle. Some metals and joint types require higher and some lower flow rates.
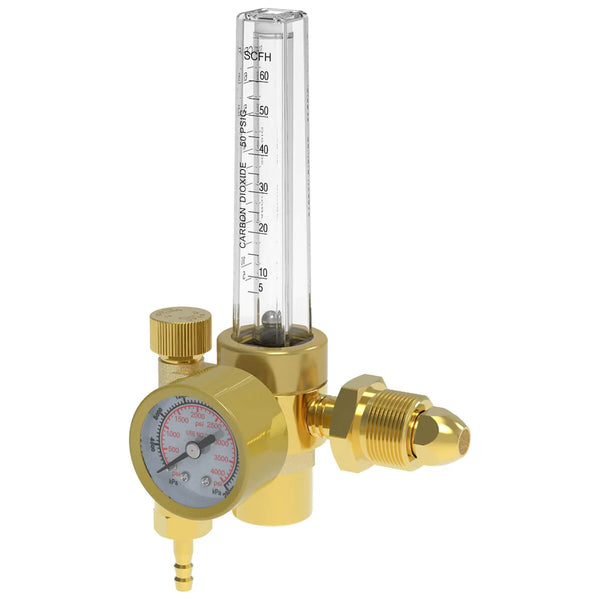
Screw the gas regulator’s inlet valve into the gas tank while the main gas tank’s valve is shut. Stay clear from the regulator’s path before releasing the gas from the bottle’s main valve. If your regulator gets damaged, its pressure gauge can explode, so it’s safer to always position yourself away from its trajectory path until you verify everything is working correctly.
Once the regulator is installed, attach the gas hose to its outlet valve and connect it to your TIG welder’s inlet valve. If your TIG welder doesn’t have an inlet valve, you can attach the gas line directly to most TIG welding torches.
Most TIG welding jobs require about 15-20 cfh shielding gas flow. Some complex joints may require a higher flow. Likewise, making out-of-position welds needs higher shielding gas flow to compensate for gravity pulling down the gas.
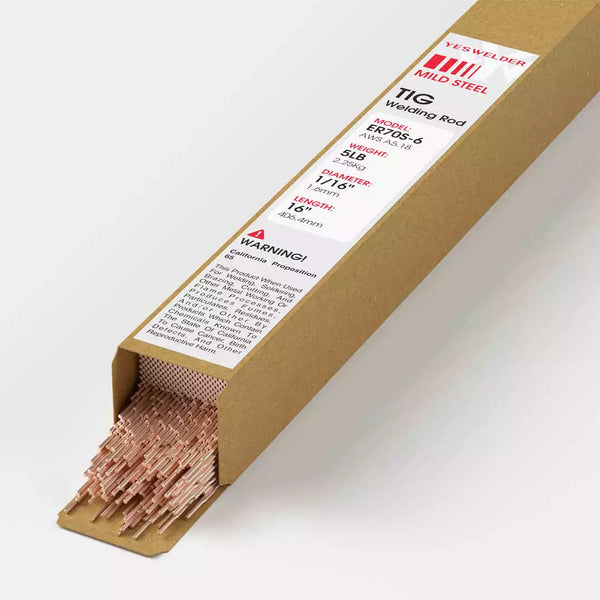
Filler Wire Selection
You need to select a suitable filler metal wire for the material you are welding. The wires listed below are the most commonly used for welding common metals like mild steel, stainless steel, and aluminum.
|
TIG Filler Metal Wire Selection |
|||
|
Material Type |
Filler Metal Choices |
||
|
Mild Steel |
ER70S-2 |
ER70S-4 |
ER70S-6 |
|
Stainless Steel |
ER308L |
ER309 |
- |
|
Aluminum |
ER4043 |
ER5356 |
- |
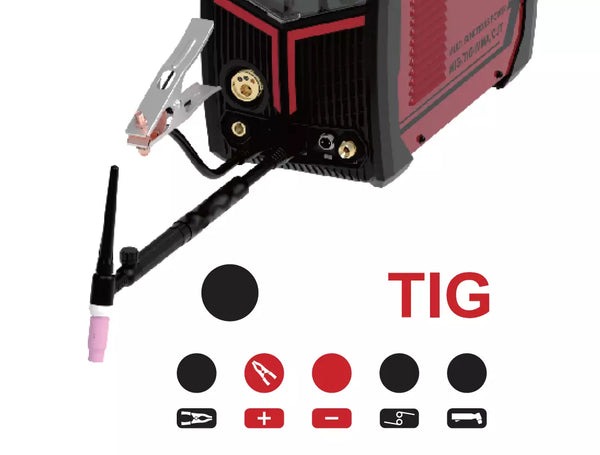
Polarity - DCEN, DCEP, And AC Explained
You must choose a suitable polarity when using the TIG machine in the DC output mode. Your electrode (TIG torch and its tungsten) can either be positive or negative, and you set the polarity by plugging the TIG torch into the positive or negative DINSE socket on the front of your TIG welder.
So if you wanted to use DCEN (direct current electrode negative), you would plug the TIG torch into the negative DINSE socket and the ground clamp into the positive DINSE socket.
Source: https://yeswelder.com/blogs/yeswelder/yeswelder-mp200-5-in-1-welder-cutter-user-guide
Most DC TIG welding applications require the DCEN polarity setup because the DCEN provides the deepest penetration and concentrated heat input. So, you need to use the DCEN setup for steel, stainless steel, nickel alloys, copper, and similar materials.
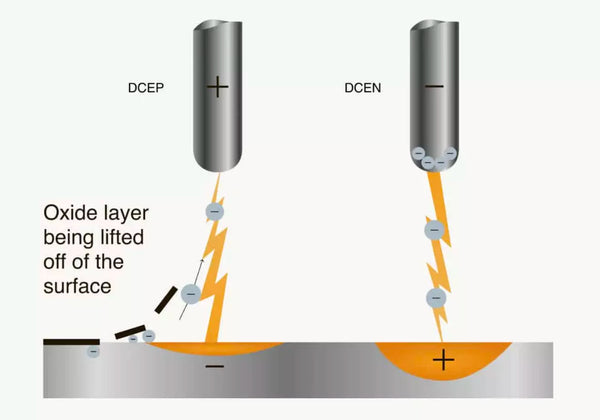
But, you must use AC TIG for welding aluminum and magnesium because the AC alternates the polarity between DCEN and DCEP many times per second. You can’t weld aluminum without the DCEP because the DCEP is crucial for aluminum oxide removal from the surface. So, DCEN provides weld penetration, but DCEP removes oxides and ensures a clean, strong aluminum weld.
Source: https://weldguru.com/what-is-tig-welding-used-for/
The DCEP concentrates electricity at the tungsten electrode, not the welded material. So, it’s not a good choice for deep penetration. But, if the electrode is positive (DCEP), the electrons from the grounded aluminum (negative ground clamp attached to it) jump from the aluminum to the electrode. As a result, the aluminum oxide is broken from “within” as the electricity jumps from the base aluminum to the positive electrode.
You don’t need to use DCEP polarity in everyday welding tasks. If using AC, the welder will automatically apply DCEP in combination with the DCEN. But, if you are using DC TIG, just stick with the DCEN.
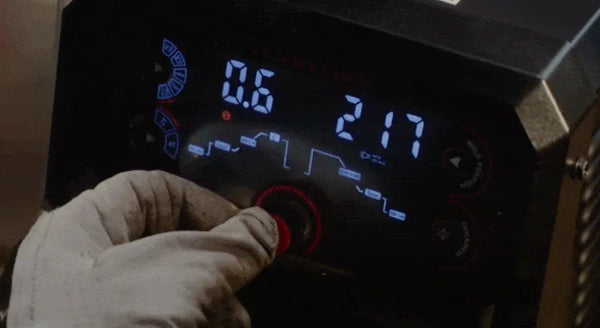
TIG Welder Settings
TIG welders can have as little as one setting to adjust amperage output or tens of settings for professional TIG welding applications. Many YesWelder TIG machines are loaded with settings to help you adapt your welding arc precisely as you want it.
Let’s start with the basic settings and work our way to the high-end settings you can find on YesWelder TIG welders.
- Amperage Output - Most small TIG welders only support amperage output settings.
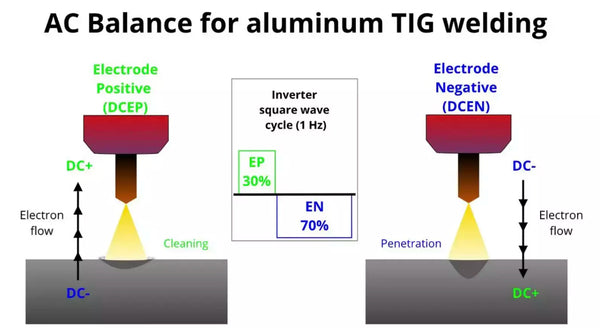
- AC Frequency - AC frequency determines how many times DCEP and DCEN alternate using AC TIG. This determines how focused vs. how wide the arc is.
- AC Balance - AC balance determines the length of DCEN and DCEP portions of one AC cycle. It allows you to modify how much penetration vs. cleaning action you want the welder to perform.
- AC or DC Pulse - Pulse settings alternate between the high (peak) and low (background) current, reducing the average input into the joint. DC or AC pulsed TIG is used to prevent burn-through and warping on thin materials, and corrosion resistance loss on stainless steel.
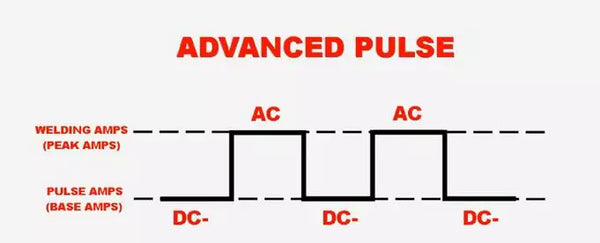
- Pulse Width - Determines how long the peak current lasts in each pulse cycle. As a result, you can input less or more heat by modifying the peak current duration vs. the background current duration.
- Peak Current - Peak amperage output of a single pulse.
- Background Current - Lowest amperage output of a single pulse
- Pulse Frequency - Determines how many times per second the peak and background currents switch. For example, 100 pulses per second means that the peak and background current switch 100 times per second.
- Pre-flow - The length of time how long the shielding gas flows from the TIG torch before the arc is initiated. This is used to soak the joint into the protective gas before welding sensitive metals.
- Post-flow - Determines how long the shielding gas will flow from the torch after you turn off the arc. Highly useful setting when welding sensitive metals like stainless steel and titanium, which tend to oxidate as the weld cools.
Some settings are only available using the 4T mode instead of a TIG foot pedal. You can either use a foot pedal to vary output current by “throttling” up or down on the pedal, use 2T mode as the most basic on/off current, or use 4T mode which allows you a bit more control than 2T but less than the pedal.

Source: https://weldguru.com/2t-vs-4t/
Settings available with 4T on some TIG welders are:
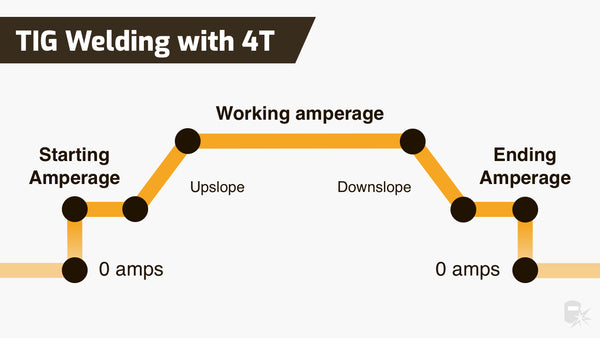
- Initial Current - The starting arc current. This current is released immediately after the pre-flow ends and after you touch the torch’s button. Usually, a lower current is desired when welding thin stock to prevent burn-through during arc ignition.
- Upslope Time - The time it takes for the initial current to rise to the peak set current.
- Peak Current - The highest current value you set to weld 99% of the joint’s length.
- Downlslope Time - Determines how long it takes for the peak current to drop to the ending current as you touch the power button on the torch to turn off the arc.
- Ending Current - Ending current allows you to fill in the crater at the end of the weld and slowly cut out the arc to prevent thermal shocks of the material.
You can have three arc-starting methods for TIG welding, and they have varying degrees of quality.
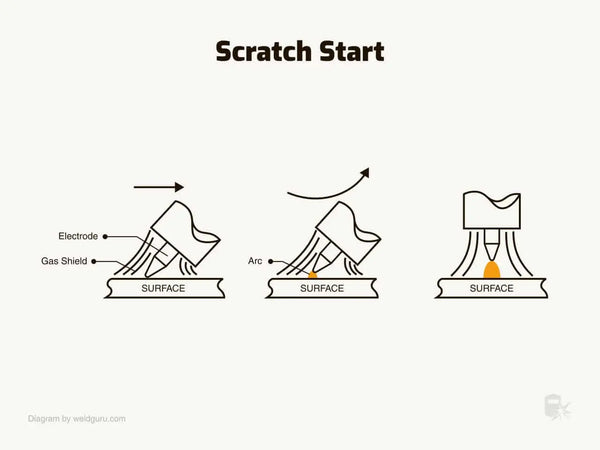
- Scratch start - The most basic TIG arc starting method. Scratching the welded metal with the tungsten tip initiates the arc, but it increases the chances of polluting the weld with the tungsten inclusions.
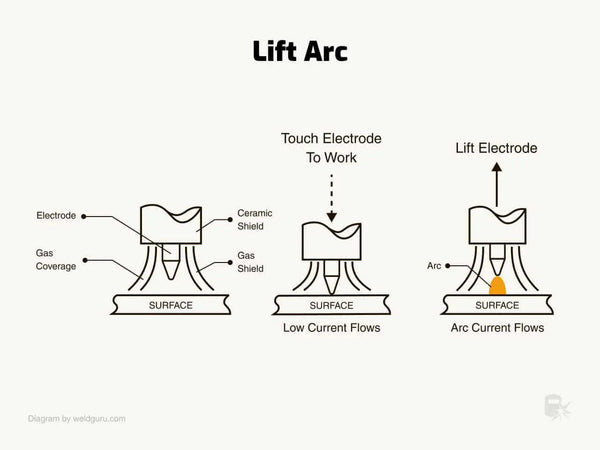
- Lift arc start - More advanced arc starting method. Just by gently touching the welded metal’s surface and lifting the torch, the arc is initiated. Still, there are chances of minor tungsten inclusions, which could weaken the weld.
- High-frequency start (HF start) - The best way of initiating the TIG arc. There is no physical contact between the tungsten and the welded metal. The arc jumps from the tungsten tip to the metal once you press the pedal or the torch’s button.
Our best TIG machines, like the YesWelder CT2050, support most of the settings outlined above and additional features not directly related to TIG.
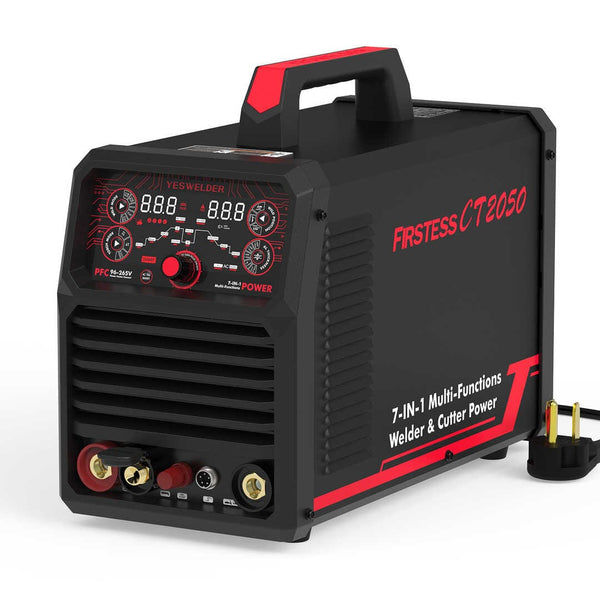
YesWelder FIRSTESS CT2050 Powerful 7-in-1 Welder & Cutter
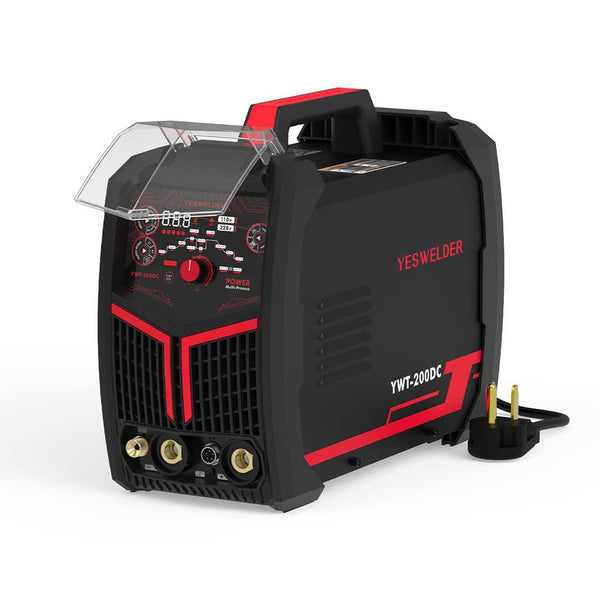
We also have the YesWelder YWT-200DC, which allows extremely fast spot TIG welding in addition to pulsed TIG features. This is the best welder in our line for jewelry and very precise thin sheet metal work.
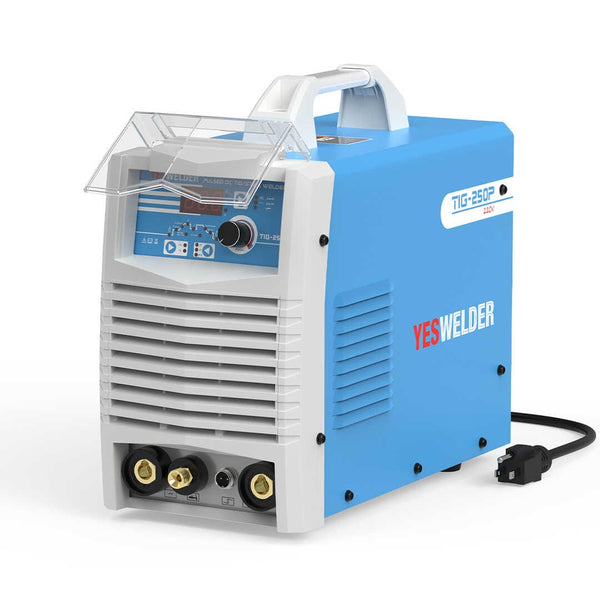
The YesWelder TIG-205DS is an HF TIG capable DC TIG welder without the pulse and other high-end features. It’s a good choice for beginners looking to enter the TIG world before trying some more advanced welders. But, the YesWelder TIG 250P DC Pulsed is an HF-capable welder with a DC pulse, allowing you a broader range of features if you don’t need AC TIG or spot TIG welding.
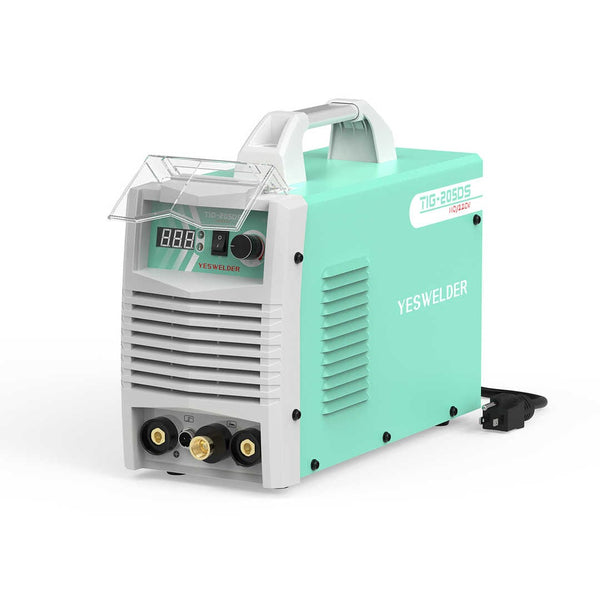
TIG Welder/ARC Welder TIG-205DS | YesWelder
DC Pulsed TIG Welding Machine with HF Start
TIG Welding Basics
Once you connect the leads to the welder, assemble the TIG torch, attach the shielding gas, and set the welder functions, it’s time to attach the ground clamp to the welded material and start welding.
If you are a complete beginner, we suggest using the regular, clean DC TIG setup at moderate amperage on a scrap piece of mild steel. Once you get some experience, you can start using the pulse settings and use AC TIG on aluminum.
Make sure you keep a firm grip over the TIG torch and position it at an angle of 70 or 80 degrees to the welded piece. Keep the tungsten within 1/16 to 1/8 inch above the workpiece. Be careful not to allow the tungsten to make contact with the welded material, as this will contaminate the weld metal and require regrinding the tungsten.
TIG welding requires both hands. Hold the torch with one hand and the filler metal rod with the other at about 15 degrees to the welded piece. It’s vital to keep the tip of the filler metal rod inside the shielded gas atmosphere, or it will oxidate at such high heat near the arc.
Never touch the tungsten with the filler metal. Instead, get the filler metal under the arc and let one droplet melt off, and dab it into the welded joint. Keep dabbing the filler metal into the molten weld puddle as you go along the joint.

If your tungsten happens to burn up during welding, you are either using too high output for the tungsten diameter, using the DCEP polarity by accident if using DC TIG, or your DCEP cleaning action is set too high on AC TIG balance control.
Conclusion
Setting up the TIG welder is relatively simple once you grasp the basics. But, adjusting the advanced features like frequency and AC balance requires some experience. It’s best to practice on scrap metal until you get a feel for these settings to see what works best for you. There is more than one way to achieve a sound TIG weld on any material, and it all comes down to how fast you weld and what arc characteristics you like the best. So, fine-tuning the TIG welder settings makes all the difference, but it does require some trial and error.
🧐How To Setup A TIG Welder For First Use- FAQ
How TIG welding process works?
The TIG is an arc welding process. So, it uses the resistance to the flow of electricity to heat and melt the base and filler metal. The power source (your TIG welder) sends electricity through the TIG torch, which goes through the welded material and flows through the ground clamp back into the welding machine. This closed circuit causes the welded metal to melt because it heats due to electrical flow resistance.
How to choose the shielding gas when big welding?
Pure argon works for TIG welding all metals from steel to aluminum and copper.
Why do most TIG welding applications require the DCEN polarity setup?
Most DC TIG welding applications require the DCEN polarity setup because the DCEN provides the deepest penetration and concentrated heat input. So, you need to use the DCEN setup for steel, stainless steel, nickel alloys, copper, and similar materials.
👏 You may be interested in the following:
2 comments


Thank you, Travis! We’re glad that you like it. :)
good detail and nice illustration
Leave a comment