 Skip to content


Stick welding: Uphill VS. Downhill
Welding is a versatile and widely used technique for joining materials in various industries. One of the most popular forms of welding is stick welding which is known for its simplicity, affordability, and ease of use.
As a hobbyist or an occasional welder, you are likely to weld in a flat or horizontal position, but troubles arise as you try vertical welding. Vertical welding is usually done uphill or downhill, and even if these welding techniques may seem similar, the weld's direction can significantly affect the strength and appearance of the weld.
In this article, we will explore the differences between uphill and downhill stick welding and examine the advantages and disadvantages of each method.

Source: https://www.corrosionpedia.com
What Is Vertical Welding, And When Is It Used?
Vertical welding is a vital welding technique that requires precision, skill, and experience to perform correctly. The weld joint is positioned vertically, and the welding is performed in an upward or downward direction, hence the names uphill welding and downhill welding, vertical up or vertical down.
Vertical welding is used in various applications, such as welding pipelines, tanks, and structural steel. It is often used with other types of welding, such as horizontal and overhead welding, to create complex welds on complex shapes.
In the construction industry, vertical welding is commonly used to weld together the frames of buildings, bridges, and other structures. In shipbuilding, vertical welding is used to join the steel plates of the ship's hull. In the oil and gas industry, vertical welding is used to join pipelines and other components that are installed vertically.

Photo by @qwesidarlington
1. Why Is Vertical Pipe welding Challenging?
Vertical welding can be challenging for several reasons, and some of the most common ones are:
- Gravity: Welding in a vertical position means gravity is working against you. The molten metal can flow downwards if it is not controlled properly, resulting in a weak or uneven weld. That's why you must employ a proper technique to ensure the metal flow correctly penetrates both sides of the joint evenly.
- Access: In some cases, the location of the joint to be welded can be challenging to access. Welding in a vertical position may require you to stand on a ladder or scaffolding, which can be dangerous and require additional safety precautions.
- Heat input: In vertical welding, you can find it hard to control the heat input to the weld. The heat can build up more quickly in the weld, resulting in warping or distortion of the metal, and this can weaken the weld, so it does not meet the required welding procedure specification.

Source: https://www.semanticscholar.org/paper
- Weld size: Weld size is critical in vertical welding because the weld must be large enough to penetrate the joint and provide the required strength. However, if the weld is too large, it can cause weld formation defects.
- Welder's skill: Welding in a vertical position requires high skill and experience. Once you master the control over the heat input flow of molten metal and ensure that the weld penetrates both sides of the joint evenly, you will get the strongest welds.
2. Should I Stick Weld Downhill Or Uphill?
There is no simple answer to this question, but most welders prefer stick welding uphill. Uphill vertical welding is the preferred choice when stick welding thicker steel. On pieces larger than 1/8", welding uphill provides better penetration, therefore, good weld strength and fusion.
However, when welding thin metal, you should avoid vertical up welding. Due to higher penetration and heat build-up, you can experience burn-through, wrapping, or distortion, so you should use downhill welding. You cannot burn through the pieces as gravity pulls down the puddle, so you get a strong and visually acceptable weld.
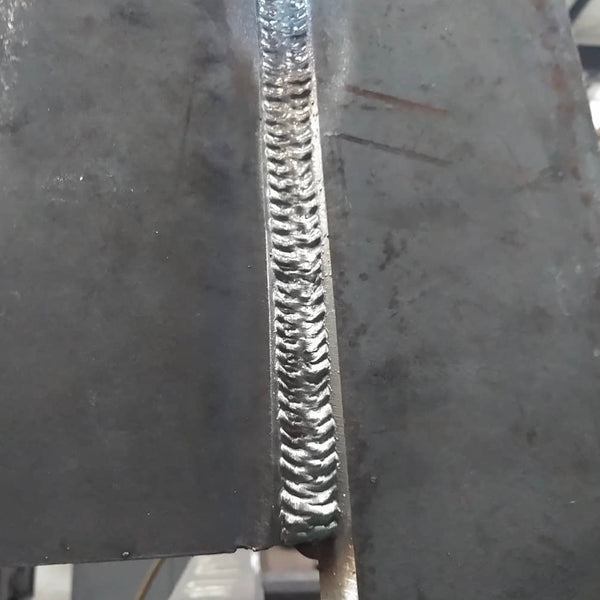
Vertical uphill plate test.
Photo by @thearcangelwelder
Uphill Welding (V-Up Stick Welding)
When stick welding in a flat position, you pull the electrode to prevent contamination or slag inclusions from your weld. However, during the uphill welding with a SMAW welder, gravity does that for you, so you'll push the electrode up. In this technique, you begin by welding from the bottom and slowly moving the weld pool upwards, creating strong support for your joint.
Since you are working against gravity, uphill welding is much slower and requires fewer amps. However, slow speed and tight arc length are good combinations that create stronger welds on thicker materials. Additionally, the hot arc burns through mill scale, rust, or other contaminants, so the weld preparation is minimal.

Mill scale
source: https://en.wikipedia.org/wiki/Mill_scale
1. Stick Electrodes For Uphill Welding
Uphill welding is usually done using the E7018 electrode with a smaller diameter. This is a low-hydrogen iron powder-type electrode that produces high-quality welds. It can be used in all positions on AC or DC reverse polarity welding current.
The flux covering of E7018 deposits weld metal that's in almost every way stronger than the other rods. Iron powder increases the deposition rate and fills the joint faster, which is crucial when dealing with gravity. However, when welding with E7018, you will keep a short arc length and a slow and steady speed. That way, the weld metal doesn't drip down the weld, and the bead will look great.
Alternatively, you can use E6010 (E6011) electrodes to stick welding vertically up. This is an all-position, cellulosic electrode that has a quick-starting, steady, and deep penetrating arc. It was developed for the pipe welding industry, where uphill or downhill welding is usually used. But remember that some inverters dislike this electrode type, so welders turn to E6011 as an alternative. Fortunately, you can use YesWelder Arc205 to burn nearly all electrodes when stick welding vertically. Nonetheless, these require specific welding techniques to get the best out of the weld puddle, so many welders prefer E7018 for uphill stick welding.

Stick Welding Machine ARC Welder 205A | YesWelder
2. Welder Settings For Uphill Stick Welding
After you have selected the right electrode for your uphill welding, you should tune the welder. The required amperage will usually depend on the electrode diameter and manufacturer, but there are a couple of rules.
When going uphill, you should set your welder to DCEP (DC+) polarity to get maximum penetration on thicker metals (not to be confused with TIG welding, where DCEP provides more cleaning). Fundamentally, you don't need too large electrodes and too much power. Usually, a 3/32 E7018 with 70-90 amps will do just fine. As a rule of thumb, you want 10-15% less power than welding in a horizontal position and a lower travel speed. You can tune it up by 5% if you want to burn through rust, dirt, or surface contamination. The goal is to get a tight arc that is focused and controllable.

Source: https://www.britannica.com/technology/
Nonetheless, the tight arc with slow speed can cause weld defects known as arc blow. Arc blow occurs once the base material gets overheated, and the arc outruns the bead or starts to wander away from the joint. You can deal with it by switching to AC polarity, but only if your electrode supports it, and as a last resort, it can lack the penetration required when stick welding uphill.

Source: https://quizlet.com/515075231/lesson-6-flash-cards/
3. Uphill Welding Technique
The technique required for stick welding uphill will depend on joint configuration, metal thickness, and electrode type. Still, to get perfect control over the molten puddle, in most cases, you will have to weave the electrode to fill the gap. Stringer beads are used on thinner metals to fill the small gap and during the downhill pipe welding. Therefore, uphill is considered a much more challenging position than welding downhill.
The most common type of joints you will weld vertically with a stick welder is the Tee, Lap, and butt joint.

Source: https://tigbrush.com/blog/various-types-of-welding-joints-and-their-uses/
For the Tee joint, you must start from the bottom and use a weaving motion in the shape of a triangle. This is usually the case with E7018, and this technique will prevent your puddle from slipping down.
Additionally, if you are using E6010s, you can use the "whip and pause" technique. This technique is used with high cellulose rods in case they are subjected to intense heat from the weld. To perform the whipping technique, you start from one side to the other, then take the rod from the weld crater but do not break the arc, then move to the other side, take it out, rinse, and repeat. That way, the filler material hardens and doesn't drip down the weld. Finally, if you are stick welding multiple passes in the Tee joint uphill, use Z weaving or Box weaving motion, but longer pauses at the end of the weave will ensure fusion without undercutting the edges of the plates.

Source: https://slideplayer.com/slide/1524961/
Stick vertical up welding on the lap joint is quite similar to the Tee joint. You can use a triangle weaving motion, but ensure you don't get any filler metal to go over the weave edges you made. Similarly, when welding thicker pieces in a multi-pass, use box or Z weaving motion, with pauses for proper filler distribution and good tie-ins. Make sure to clean each pass to avoid slag inclusions that can cause critical failure of the weld.
Butt joints smaller than 1/4" can be welded with uphill welding using a triangle weaving motion we already described. Fundamentally, the metal preparation is similar to the other joint designs. But if the thickness of the pieces surpasses 1/4" inch, you will need multiple passes and a whipping technique.

Photo by @natevbsd
4. Advantages and drawbacks of Stick Welding Vertical Up
Advantages:
- Excellent penetration
- You don't need big electrodes or too much amperage to fill the large hole.
- It works great with thick pieces and with multi-pass welding.
- It has a low risk of undercutting, inclusions, and other defects.
- It allows you to control the puddle and weld metal deposition.
- Stick welding is more cost-efficient than other welding processes, such as MIG welding or TIG (GTAW) welding.
Drawbacks:
- It doesn't work great with thin metals.
- Arc blow can occur.
- It requires higher welding skills of the operator.
Downhill Welding (Vertical Down)
Downhill welding includes welding in a vertical position, but compared to uphill, you start from the top of the joint and move toward the bottom. This method is used for thinner metals, where you want to avoid the heat build-up of uphill welding. Extruded materials and thin metals don't dissipate heat as good thick ones, so burn-through, wrapping, or distortion can occur when welding up.
Compared to uphill pipe welding, pipe welding downhill is traditionally reserved for materials that are thin enough that the speed of movement required isn't likely to cause weld defects like lack of fusion. For example, uphill is used to weld pipes in petroleum refineries, while pipe welding downhill is often used to join longer pipeline sections that feed these refineries with crude oil.
The gravity, your enemy in vertical up welds, can now work for you as it drags down the weld pool. Yes, that can also cause defects such as undercut, inclusions, porosity, or lack of penetration, but if you go fast enough, you can finish your job quickly. You want to find a sweet spot where you move fast enough so that you stay ahead of the molten metal but also provide desirable fusion and penetration in pieces.
1. Stick Electrodes For Downhill Welding
Welding downhill will require E6010 or E6011s to perform the weld successfully. As noted, these high cellulose rods ensure a strong protective umbrella of flux to help prevent contamination of oxygen, hydrogen, or carbon in the weld. The weld pool wets and spreads well yet sets up fast enough to make this electrode ideal for downhill welding techniques. As a result, these are the only types that are suitable for downhill pipe welding.
However, E6010 electrodes require more voltage than other electrodes. Power sources designed for running EXX10 electrodes must have a high open circuit voltage (OCV), so the latest inverter machines can struggle to provide a stable arc. That's why many turn to E6011s, which provide similar results, but you can use basic stick welders to run them. Nonetheless, advanced machines such as YesWelder YWA-160 will let you run any of the electrodes for welding in a vertical position, including the notorious 6010s.

YesWelder YWA-160 IGBT Inverted Stick Welder
Alternatively, if you are stick welding sheet metal in a vertical position, which is actually rare, you can use E6013s. These are one of the easiest-to-use electrodes with good tensile strength, but they have a lot of drawbacks if you use them to weld downhill. The slag is extremely fluid, which means you will have to go super-fast to outrun it. By doing so, you can lack penetration, and if you slow down, slag inclusion can occur. However, their only advantage is the ability to work with DCEN (DC-) polarity, which limits the penetration, which is essential when welding thin materials.
2. Welder Settings When Stick Welding Downhill
As noted above, welding thin materials downhill is ideally done at DCEN polarity, which in stick welding provides less penetration, but you will have to use E6013s, which can cause a lot of issues. Therefore, you should stick to DCEP polarity and either E6010s or 6011s.

5/32" 6010 root, stick welding downhill
Source: https://www.youtube.com/watch?v=r8Gap64_Fig&t=305s
Since you need to be fast to outrun the molten metal, you will need a fast travel speed and 10-15% more penetration compared to stick welding in a horizontal position. Setting 80 to 90 A for a 1/8-inch electrode and 105 to 115 A for a 5/32-inch electrode will give you a great head start. If you have issues with the arc stability of the E6010s, you can always adjust the arc force. With it, the machine compensates for voltage fluctuations, retaining good arc stability, which results in smooth welds.
Additionally, you want to use a similar or larger diameter electrode compared to welding in a flat position. Larger electrodes will provide enough filler metal and a strong weld when you weld downhill, but always follow the manufacturer's recommendations and make sure your selected electrode is compatible with a power source, amperage, and polarity.
3. The Technique When Stick Welding Downhill
To weld downhill, you don't need fancy moves or advanced electrode manipulation. Since you are using a larger diameter stick electrode, you can usually fill the gap of the thin metals by using a single stringer bead. The same rules apply when welding a root pass in pipe welding downhill. Large-diameter electrodes at a 5 to 15-degree drag angle and moving in a straight line will get the job done on a root pass.

Root pass
photo by @totalqualitygtaw
If you are dealing with a larger gap or need to stick weld hot, fill, and cap passes in downhill pipe welding, you will have to make some adjustments. In these situations, you won't need special consumables, but you might want to choose the largest allowed electrode. Since the gap is larger, you will want to introduce a slight weaving motion. Upside-down U motion will protect the pool from sagging.
Overall, stick welding downhill is considered significantly easier than welding up since you won't need to master zig-zagging, whipping, or other challenging techniques. However, the sole nature of welding vertically downhill makes its applications fairly limited, which is why many prefer welding up.
4. Advantages And Drawbacks of Welding Downhill
Advantages:
- It requires less skill to perform.
- It's great with thin materials and pipes.
- It provides high welding speeds.
- You can use larger electrodes.
- You won't need special patterns and techniques to perform it.
Drawbacks:
- Limited penetration on thicker pieces.
- Molten puddles are not allowed to outrun the welding arc.
- High risk of defects such as lack of fusion, porosity, slag inclusions, and undercut.
- Used only in specific applications and on thin metals.

Photo by @weld_lif3
Conclusion
The choice between uphill and downhill stick welding is an important decision that can significantly impact the strength and appearance of the final weld. While both methods have their advantages and disadvantages, uphill is generally preferred for its higher quality and better penetration, especially in thicker materials. However, downhill is faster and can be used for thinner materials.
Ultimately, the choice between up and downhill welding depends on the specific application, the type of material being welded, and the welder's skill level. By understanding each method's differences and proper techniques, welders can achieve high-quality welds that meet the required specifications.
👏 You may be interested in the following:
- Stick Welding Electrodes Comparison: Which is The Most Difficult To Run?
- How To Weld Aluminum - MIG, TIG, And Stick Welding Explained
2 comments


Thank you for sharing your welding experience, Chad! :)
I love welding vertical. I also used to do a lot of mirror welding in the shipyard in tight spaces using a leather hood.
Leave a comment