MIG Welding Aluminum For Beginners
Welding aluminum is more difficult than welding steel, but you are much more likely to create quality welds if you learn the basics.
MIG welding aluminum is easier than TIG welding aluminum, and it requires less costly equipment. However, there are still many variables and areas where you can make a mistake.

In this MIG welding aluminum for beginners guide, you will learn why aluminum is challenging to weld, how to set up your MIG welder, clean the aluminum, and the basic techniques for welding aluminum.
So, let's get started with the primary point.
Why Welding Aluminum Is Difficult
Aluminum has a great affinity for oxygen, and as a result, its atoms combine with oxygen from the air forming an oxide layer on the aluminum's surface. This oxide has a higher melting point than the pure aluminum underneath it, and this is the first challenge you'll face when welding aluminum.

Pure aluminum has a melting point of 1200°F (650°C) while the oxide on the surface has a melting point of 3700°F (2037°C). In a nutshell, this means that you must remove the oxide layer before attempting to MIG weld aluminum.
The next issue you'll face is the high conductivity of aluminum. This metal rapidly conducts the heat away from the welded joint. Which means that you must apply more heat to weld this metal compared to mild steel.
However, the low melting point of pure aluminum, coupled with the need to apply high heat due to aluminum's high conductivity, results in a narrow window of temperature workability. This means it's easy to burn through or not apply enough heat to start the puddle.
Additionally, the aluminum welds will shrink in volume by approximately 6 percent after the weld cools. The shrinkage may lead to cracks due to excessive joint distortion from the resulting stresses.

Aluminum has a strong proclivity for contamination. Therefore, it must be thoroughly cleaned and welded in a relatively clean environment. Be careful of cross-contamination resulting from airborne metal dust particles like mild steel dust and sparks.
Cleaning the Aluminum Before MIG welding
The naturally occurring oxide layer on the aluminum surface must be removed before welding. But removing this layer first is not a good idea.
First, the aluminum piece needs to be cleaned from dirt, oils, and grease. Otherwise, you risk embedding these impurities in the aluminum piece when you start removing the aluminum oxide.
Safety Tip: Aluminum is non-magnetic metal. If dust or debris enters your eyes, the ophthalmologists will have a difficult time providing medical care. Make sure you wear all necessary safety equipment, including eye protection.
Aluminum is typically cleaned with a stainless steel brush. However, you must use a wire brush dedicated to aluminum only. If you use a brush that was used to clean mild or stainless steel before, you will contaminate the aluminum, and the weld will be weak because of porosity.

You can also use specialized grinding wheels for aluminum to remove the surface oxide. But regular grinding wheels are not recommended. They will load up with aluminum quickly because aluminum is soft and has a low melting point.
This metal can also be cleaned with strong alkaline or acid, but it must be rinsed and thoroughly dried before welding. But most hobbyist welders should stick with a hand brush for aluminum MIG welding.
Safety Equipment For MIG Welding Aluminum
As with any arc welding process, MIG requires you to wear a welding helmet to protect your eyes and face from harmful radiation. You should also wear welding gloves, a welding jacket, and an apron at minimum to protect against radiation, high heat, and molten spatter.
Using a welding respirator is also a good idea, especially if welding in less than ideal ventilated environments.
Ensure that you are wearing safety glasses underneath the welding helmet, especially when grinding or cutting. Always abide by the code and laws in your area. Remember, welding is an excellent hobby, but it's also a dangerous activity if you are unprotected.
Preparing Your Equipment to MIG Weld Aluminum
Now, let's see everything you need to know to successfully weld aluminum as a beginner. We will cover the MIG aluminum filler wire, spool gun, shielding gas, welding machine, spray transfer, wire feed, and other vital details.
Shielding Gas
MIG welding aluminum requires the use of 100% Argon shielding gas in most cases. Hobbyist welders won't benefit from any other gas mixture, but you should know that the addition of helium can help you achieve deeper penetration on very thick aluminum sections.
Pure argon is the most popular shielding gas because it allows great arc start and stability. Adding helium helps with penetration but at the cost of arc stability. Plus, it widens the weld bead. So, for most people, pure argon shielding gas is the way to go.
MIG Welding Aluminum Wire Selection
Aluminum welding filler wire selection depends on base aluminum alloy and the conditions the finished part will be subjected to. Therefore, it's essential to match the filler wire with these two variables.
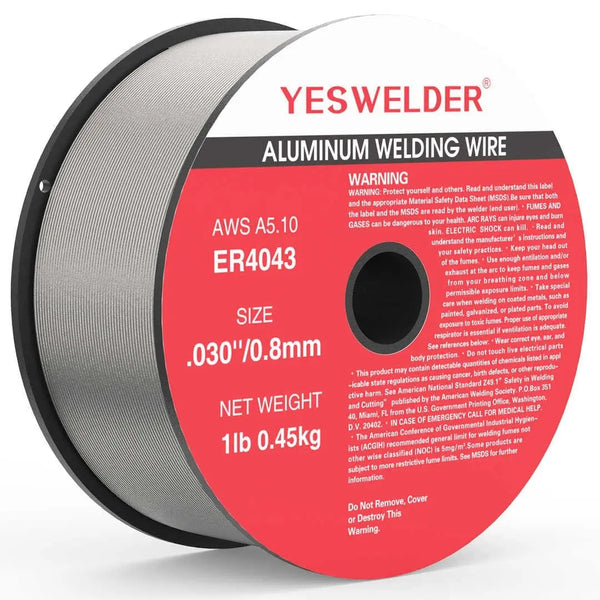
The most commonly used MIG aluminum welding wires are ER4043 and ER5356.
ER4043 is a general-purpose MIG welding wire used to weld 2014, 3003, 3004, 4043, 5052, 6061, 6062, and 6063 aluminum alloys. The welds provide high ductility and excellent resistance to cracking. Plus, the wire has silicon additions which lower the melting temperature and promote weld pool liquidity.

ER5356 has magnesium additives for improved tensile strength, but unlike the ER4043, the ER5356 has a lower resistance to cracks during welding. The ER5356 welds 5050, 5052, 5056, 5083, 5086, 5154, 5356, 5454, and 5456 aluminum alloys.
Spool Gun or Graphine Liner for a MIG Gun
You can successfully MIG weld aluminum without a spool gun if you use a graphene liner for a MIG gun and a few other parts the MIG welder manufacturer may specify.
A spool gun is also an option, but it's an additional investment. The spool gun has a spool system attached to the MIG gun and a wire feed drive roll. So the aluminum wire doesn't have to travel from the wire spool inside the welder and possibly cause wire nesting. The advantage of a spool gun is the improved reliability. Still, the disadvantage is higher costs and the inability to access tight spaces because of the large spool attached to it.
Some welders like the YesWelder 250A Aluminum MIG Welder has spool gun compatibility. Using 100% argon shielding gas, a U-type roller, A+ tips, and a graphene liner, will provide good results for hobbyist aluminum MIG welding needs.
Either a graphene liner set up or a spool gun is necessary to MIG weld aluminum. That's because the aluminum wire is soft and can easily kink in the regular wire feed meant for mild steel wire.
Achieving a Spray Transfer When MIG Welding Aluminum
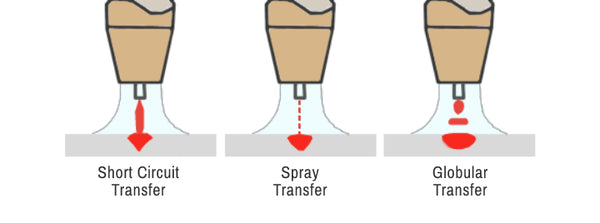
When MIG welding, you can have either globular, short circuit, or spray modes of metal transfer. However, MIG welding aluminum is best achieved with spray transfer.
Spray transfer requires high travel and wire feed speeds. It uses high amperage and voltage settings and results in tiny molten droplets across the arc. The arc stays ignited at all times, and the metal deposition rate is high. The wire use efficiency is also higher than globular or short circuit because there is very little filler metal lost through spatter.
To achieve spray transfer for MIG welding aluminum, you need to set up the wire feed speed and voltage to work together. Not one should be too low or too high in comparison to another. It's best to use the MIG welder's recommended settings and fine-tune them for your personal preference.

You should know as a beginner that if you need to increase the wire speed and voltage to weld thicker sections, you should proportionally increase both settings. Additionally, it's better to start with the lower voltage than overly high voltage settings because your MIG gun tip can arc out and need replacement. Then, gradually increase the voltage on the test aluminum piece until you get a feel for it.
On the other hand, if you are running too hot and burning through the aluminum, lower the wire feed speed and voltage but again with the emphasis on testing out the lower voltages first. Once you get better at this, you won't need to make test welds.
Preheating the Aluminum
Usually, it's not necessary to preheat the aluminum in a professional setting. However, you can benefit by preheating when MIG welding aluminum for a light welding shop or hobbyist application. Using a standard rosebud to preheat to about 200°F will help you weld higher material thickness and massive aluminum sections.
Since aluminum has high conductivity, sometimes it's difficult to weld thicker parts with standard equipment. In a professional environment, welding thicker aluminum is done with expensive high amperage equipment and requires no preheat, but most people don't have the need or the resources for industrial-level welders.

Never preheat above 200°F because the aluminum loses mechanical properties with too much heat exposure. So, keep all preheating to a minimum and only apply it if necessary.
MIG Welding Aluminum Technique
To achieve the best weld quality when MIG welding aluminum, you should use the push welding technique. Pushing the MIG welding gun away from the puddle instead of pulling it results in a better cleaning action, improved shielding gas coverage, and reduced weld bead contamination.
Since the temperature window is narrow between the low aluminum melting temperature and the high heat conductivity, which requires high heat input, you need to weld hot and fast. This means using high travel speed because otherwise, you risk burn-through, especially when aluminum welding thin sheets. Additionally, as the entire aluminum piece heats up as you weld, you'll have to increase the travel speed even more.

If you need to weld slower, you can use a heat sink to absorb the excessive heat conducted away from the welding joint.
When MIG welding aluminum with a spray transfer, as discussed above, you will need a longer wire stick out. That's the distance between the wire tip and the metal piece. You should have about a 3/4" wire stick out in this setting. Using a shorter stick out distance tends to burn tips and makes it difficult to keep a steady spray transfer.
Another tip to prevent burning tips is to keep them recessed about 1/8" inside the nozzle. Since the weld puddle and reflective heat get very hot, keeping the contact tip any closer than that increases the chance of wire burning back to it.
Moving around the part will spread out the heat, which is helpful if you wish to reduce distortion of thin aluminum pieces and melt through. So if possible, it's beneficial to break up welds into multiple stages.
Conclusion
MIG welding aluminum is challenging, but you can become good at it with little practice. After a few completed projects, you'll feel more confident and improve your skills.
Joining aluminum with a MIG welding process is easier than getting an AC TIG welder straight away, but it provides less workability and adjustability. So, after you master this method, maybe you should try AC TIG welding aluminum.
Remember always to practice welding safety no matter the process or job at hand. Welding aluminum is as dangerous as MIG welding mild steel if necessary precautions are not implemented. Wear proper personal protective equipment and abide by the welding machine and other equipment instructions.


A good article with very helpful info,at the most beneficial time. I have a new Mig 250 Pro with ALL needed accessories still in the box, just got new bottles of gas. Ready to use it now, this info will help me to use all aspects of my new machine.
I’m a happy yes welder customer and a beginner, I got the MIG250 PRO and my next goal is aluminum, thanks for articles like this one because it talks a lot about your company values and compromise with the customer
Thanks this is a good article good tips on how to weld aluminum
This was awesome teaching here I never touch this stuff but now it’s on thank you so much for this information.
Thanks for the info
Leave a comment